
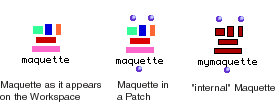
A maquette can be thought of as a special patch where a time dimension appears. maquettes icons are created on the Workspace through the command 'New maquette' in the Filemenu or by the shortcut command-2. maquettes can be dragged into a patch window, where they come equipped with one output and two inputs. It is also possible to call an 'internal' maquette (red maquette) which is the equivalent of a red Patch. The difference between these two kinds of maquette is that the internal maquette has no attachment and cannot be called directly from a Workspace but exclusively from within a patch by command-click-drag and typing the name 'maquette'. For instance, if you drag a maquette from a Workspace into a patch, the dragged maquette will reflect any changes done within its sister maquette and vice versa. One can transform ('abstract') a maquette into an 'internal' one by selecting its icon and clicking-a on the keyboard if and only if the maquette is inside a patch. (Note: Abstracted patches or maquettes may only be inside a patch and not on the Workspace.).
On the leftmost input, you'll connect a list of time offsets. On the rightmost input you'll connect a list of objects acceptable by the maquette. Other ways of filling the maquette are possible:
- First by using the maquette module addbox2maquette.
- Or by simply opening the maquette editor by double-clicking the maquette icon and dragging objects in, from the OM Workspace, from patches, or from the finder itself.
The classes of objects recognized by the maquette (i.e. objects you can drag to a maquette window, or you can input to a maquette icon):
- an aiff soundfile from the finder
- a MidiFile from the finder
- a patch
- another maquette
- a Factory icon (e.g. chord, voice) from a patch window
- a variable created inside a patch (by shift-option-click evaluation). These variables must belong to the set of classes for which a maquette protocol has been defined. Currently, all musical classes defined in the package Music:Score are available for maquettes.
- a class icon directly from a package window if that class is available for maquette (see previous)
An object can be directly entered in the maquette editor by ctrl-dragging a rectangle. This object is then obligatory of class patch.
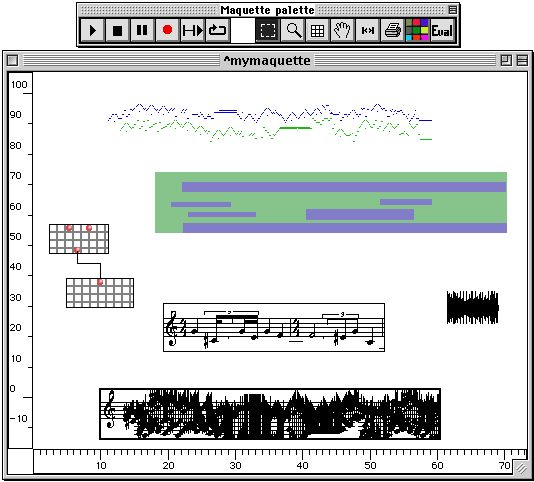
In this example, a set of objects have been entered into a maquette :
- 1 midifile dragged from the finder.
- Another maquette.
- 2 patches dragged from the Workspace that have been interconnected.
- 1 aiff soundfile dragged from the finder.
- 1 voice factory dragged from a patch.
- 1 chord-seq factory dragged from a patch.
Note: Typing shift-M switches the display to music notation
Double-clicking the temporal blocks opens the relevant editor.
Double-clicking on the interconnected patches will open a window where the patches will be accessible.
In order to access the graphical editor of the musical object computed by the patch (instead of the patch itself) option-double-click.
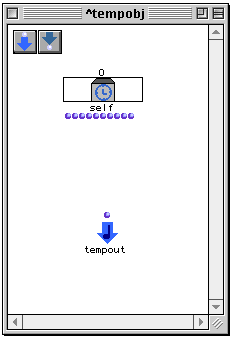
Now let us consider what happens with the two patches appearing at the bottom of the maquette. If we double-click them, we see the windows displayed below (in the same order from left to right).

These are special maquette patches (called temporal patches) that have been created automatically when patch-begin and patch-end have been dragged into (or given as inputs to) the maquette. Temporal patches encapsulate patch-begin and patch-end and add some equipment in order to control the behavior of patches in the maquette :
- a special , unique, output called tempout. Something has to be connected to tempout : this is how you tell the maquette what particular value (generally a musical object) is associated with the corresponding temporal block when the maquette displays or plays itself.
- normal inputs and outputs (simply called input and output and numbered from 0 to n) that you add using the buttons in the upper-left of the window. These are used to establish communication links (connections) between temporal blocks in the maquette. If you add inputs and outputs using the 2 buttons, they will also appear as inlets and outlets connected to the temporal blocks (rectangles) in the maquette display
- the self object, which represent the temporal block itself. The 10 outlets represent interesting slots from which you may draw information such as "where am I in time?" "how long do I last in time?" etc. (see temporalbox ). These information may be used in order to parameterize your patches.
In our example , we have added a supplementary output (output0) to the right most temporal patch (patch-end). We have added a supplementary input (input0) to the leftmost patch (patch-begin). Then, in the maquette editor window, we have connected the output of the blue patch to the input of the green one.
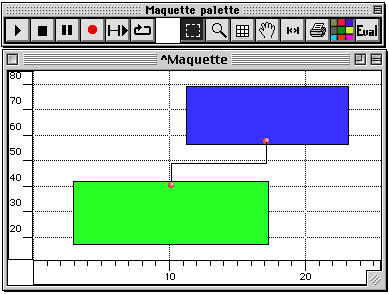
When the maquette is evaluated, using the button <eval>, the blue patch is evaluated, its output is send to the input of the green patch, which is evaluated in turn.
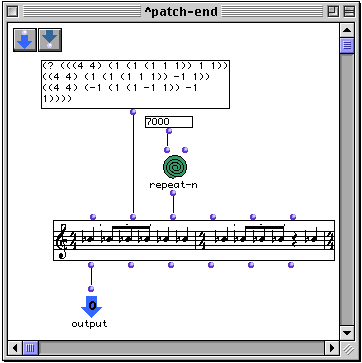
patch-end computes a single voice and sends it to its output.
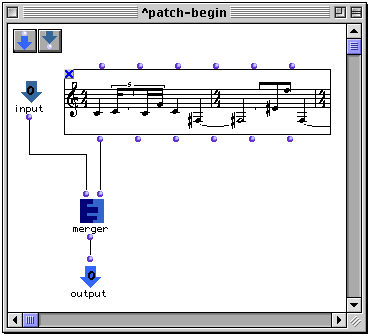
patch-begin takes one input (coming from patch-end) and merges it with a voice factory output.
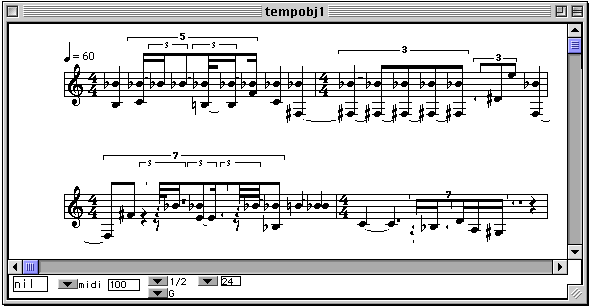
Now the final musical object computed by patch-begin is a merge of the musical object computed by patch-end and of a constant voice : if we option-double-click on the temporal block containing patch-begin, we obtain :
Selection
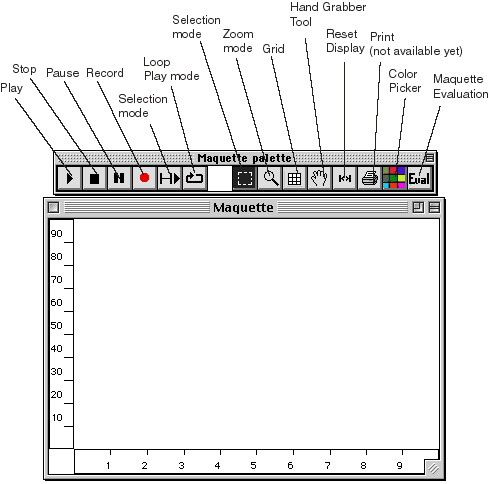
Click on temporal blocks in the maquette editor to select them. shift-click or click-drag to select many. Type 'm' to switch selected blocks from graphical representation to music notation. Type 'M' to switch all the blocks. Type 'p' to play selection (simultaneously). Click-drag a block to move it in time. Click-drag in the lower-right part of a block to stretch it or compress it in time. When a block is stretched, there are 2 colors to indicate the original (computed) size and the new size. When evaluating, the stretch factor is lost and the block goes back to its computed size. Soundfiles cannot be stretched.
Command-click-and-drag in a maquette creates a new temporal patch in the maquette.
Metric Grid
Installs a metric grid, and a metric bar in the top of the window. Double-click on this bar, shows a dialog where you enter the metrics in the form ((4 4) (7 8) (3 4) (6 8)...). Choose if you want the last measure to be repeated or the list to be cycled into.
Position
When a block is in music notation mode, use the position button, and click-drag inside the block to reposition the music notation display inside the block.
Color
Pick a color, then select the bucket and click on a block to color it. Click on the background to color it.
Eval
evaluate after every change in the temporal patches to have the maquette reflect the changes.
Pop-up menu
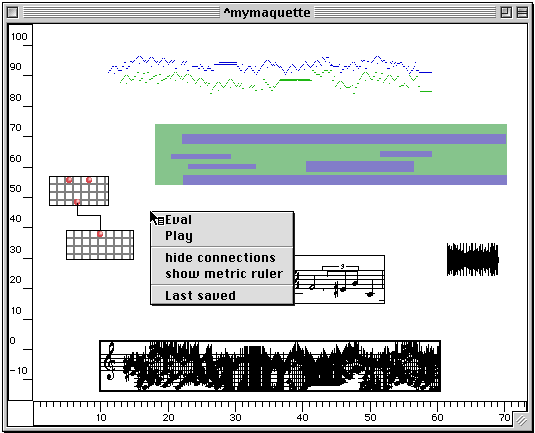
Use the pop-up menu (control-click on the inside of the maquette window) to show/hide connections.
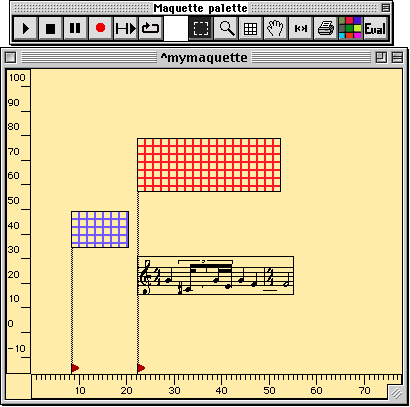
To add time constraints, option-click in the time bar in the bottom of the window. Small red flags appear. To constrain the start-time or the end-time of a block to be aligned with a flag, shift-click on the flag and drag mouse with button pressed to the left side or the right side of the block. This creates a constraint connection.
Several blocks (start or end time) may be connected to the same flag. When the flags are moved (click-drag), or when the blocks are moved, the constraints will guarantee that temporal relationships (precedence, coincidence etc.) are kept. This may result in moving the blocks or stretching them. Selecting a flag and command-clicking opens a get-info dialogue where it is possible to define time coordinates (in milliseconds).
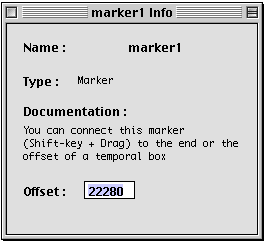
To remove a connection, select the connected line, then backspace. To remove a flag, select it then backspace.
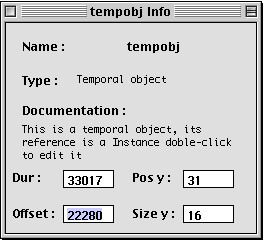
Another way to determine the positions of a temporal object inside a maquette is to select these and with command-i appears a dialogue box where it is possible to enter duration, offset time, y-position and size values.
